Must-Have Anki Addons for Medical School and How To Use Them10 min read
If you are new to Anki for Medical School check out this guide first for installing and setting it up.
The right addons can optimize your studying, everyone wants that right? Here are my must-have anki addons for medical school and how to use them.
First of all, if you don’t know how to download addons for Anki it is fairly straightforward goto tools -> addons, and this screen will pop up. Select “Get Add-ons…” and this box pictured below will appear.
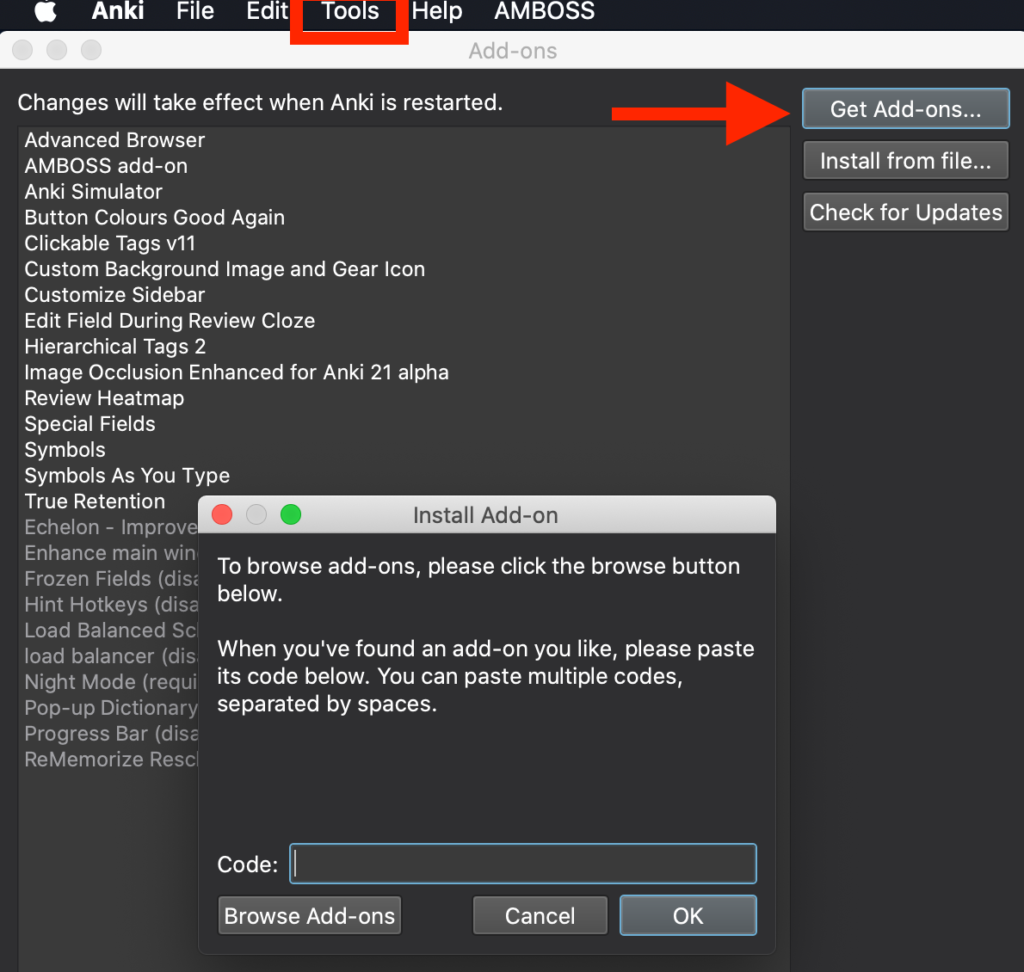
Below I have every code for every application so you don’t even need to use the links. Just copy and paste each code in to the box above, make sure they are all toggled enabled, and then restart Anki. All those addons will now be active.
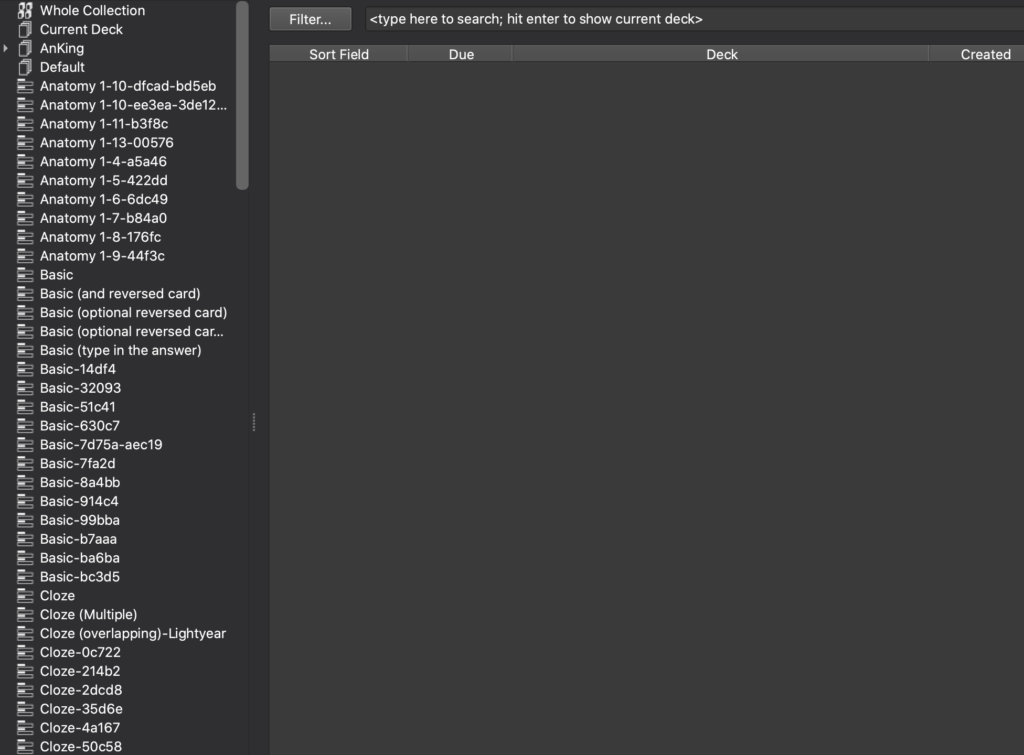
1. Advanced Browser
Link – Anki Code [874215009]
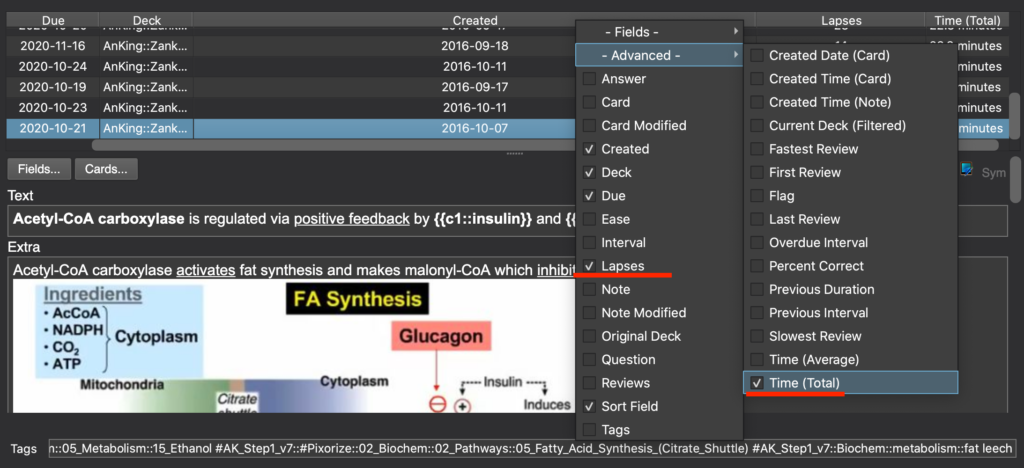
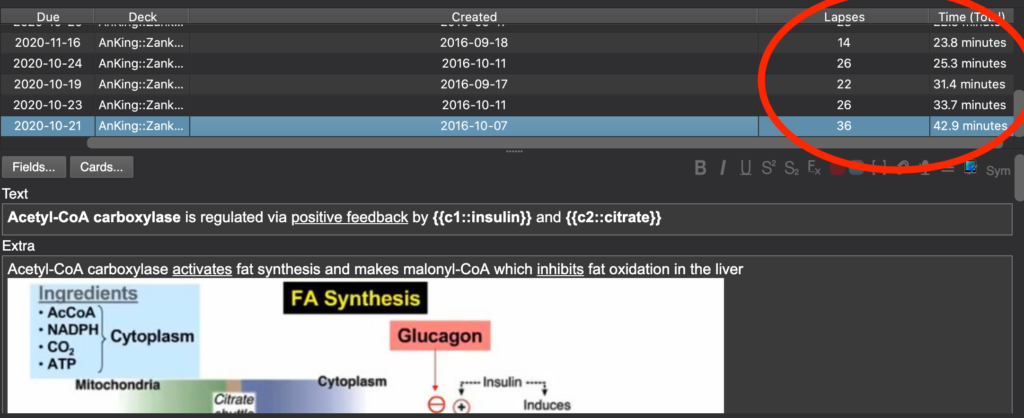
Advanced Browser allows you to add more columns than the native Anki. I personally use only two of these advanced options, Time (Total) and Lapses. I do this because about once a month I identify cards that are sticking points and try to make sure I understand them. If I find them unnecessary I will suspend them.
As you can see FA synthesis is still an issue for me…
However, edit here as you wish. You can add whatever options you think are relevant to improving your workflow.
2. Image Occlusion
Link – Anki Code [1374772155]
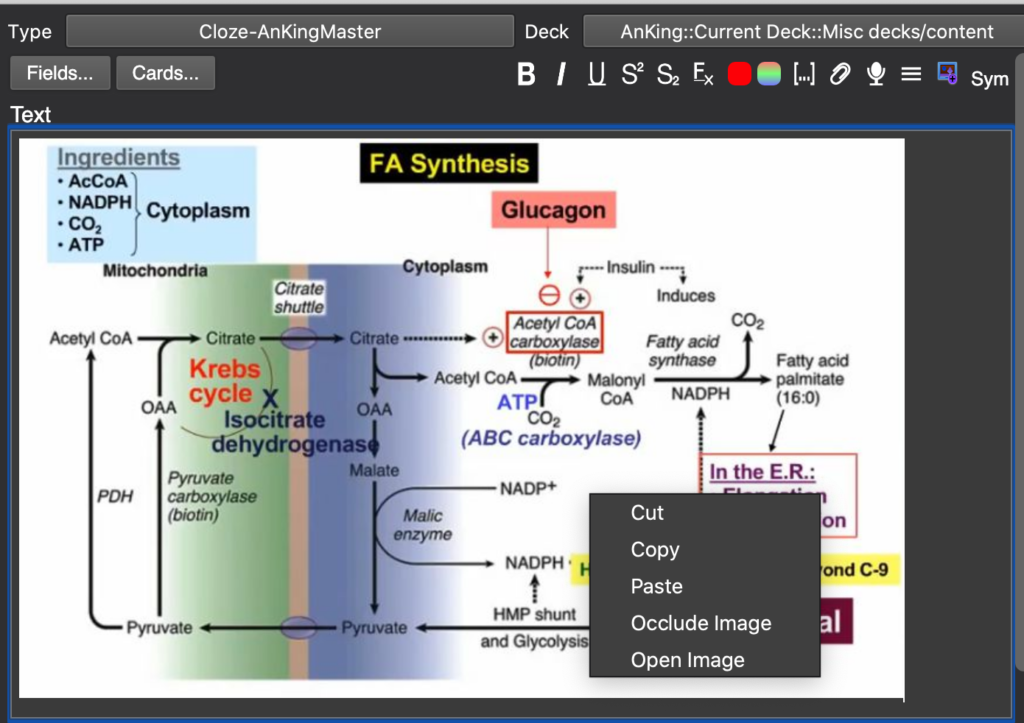
Image occlusion is amazing for anatomy, pathways, or charts. For example, if we go back to that FA synthesis chart from earlier, say I want to remember certain items along that pathway, but want to use that image.
I just copy the image onto my clipboards, go into whatever deck I want to make the card, and add a new card.
If you’ve followed my previous guide you should have the AnKing. Make sure you have “AnKingMaster” selected and just paste the image into the “Text” box. Then right-click the image and you will see an option for “Occlude Image.”
Click that.
This annoyingly complicated window will pop up. Don’t worry, we only need to click on two things. First, we want to box out what we want to learn (Red Arrows). So I boxed out glucagon, insulin, and Acetyl CoA because I want to know what induces, inhibits, and goes into Acetyl Coa carboxylase.
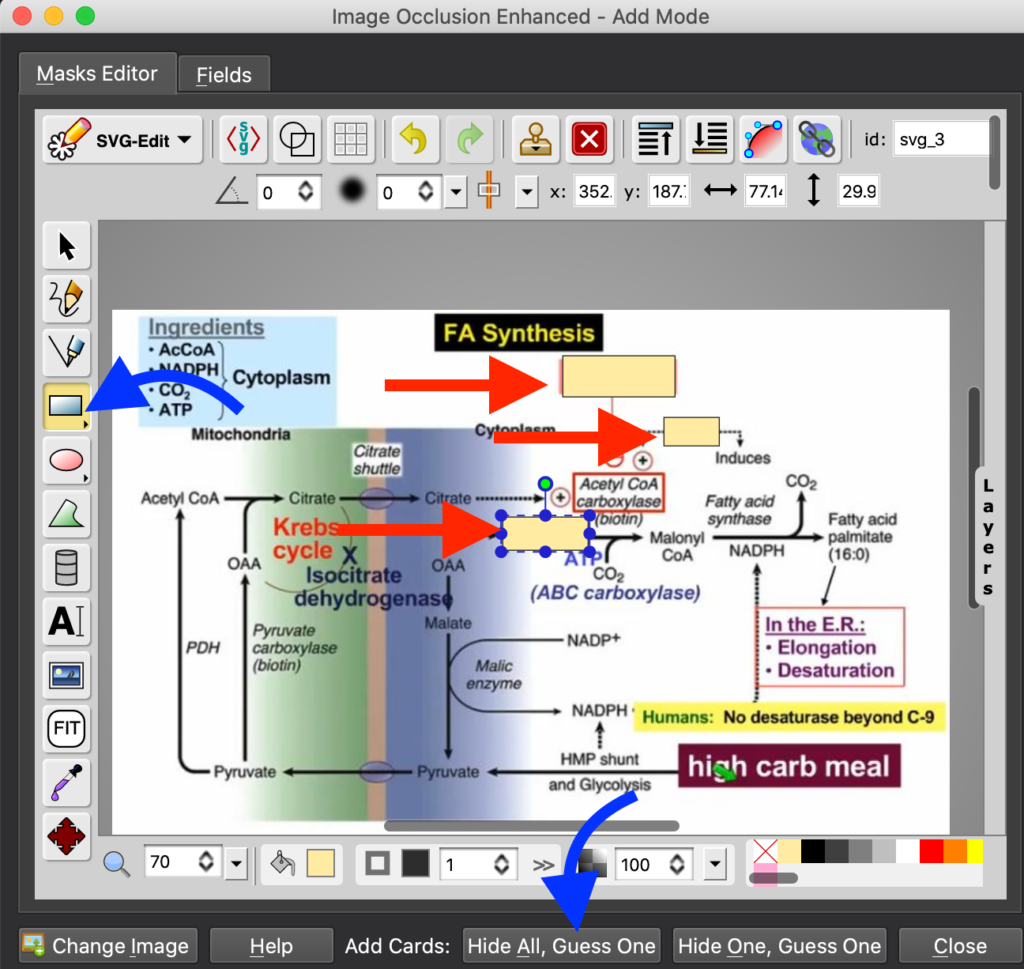
I accessed these boxes by clicking on the top left of the image (first blue arrow), and then, when I am done, clicked “Hide All, Guess One.” I select this option because I don’t want to be given the answers while I am studying! I want to understand the pathway, if I see the answer to another card on an earlier card I may get that next card right just from short-term memory as opposed to long-term memory (what I want).
A dialogue on the bottom left of your screen will show “3 cards added’ and bam! You have just added three image occlusion cards to your deck.
They will appear to you something like this.
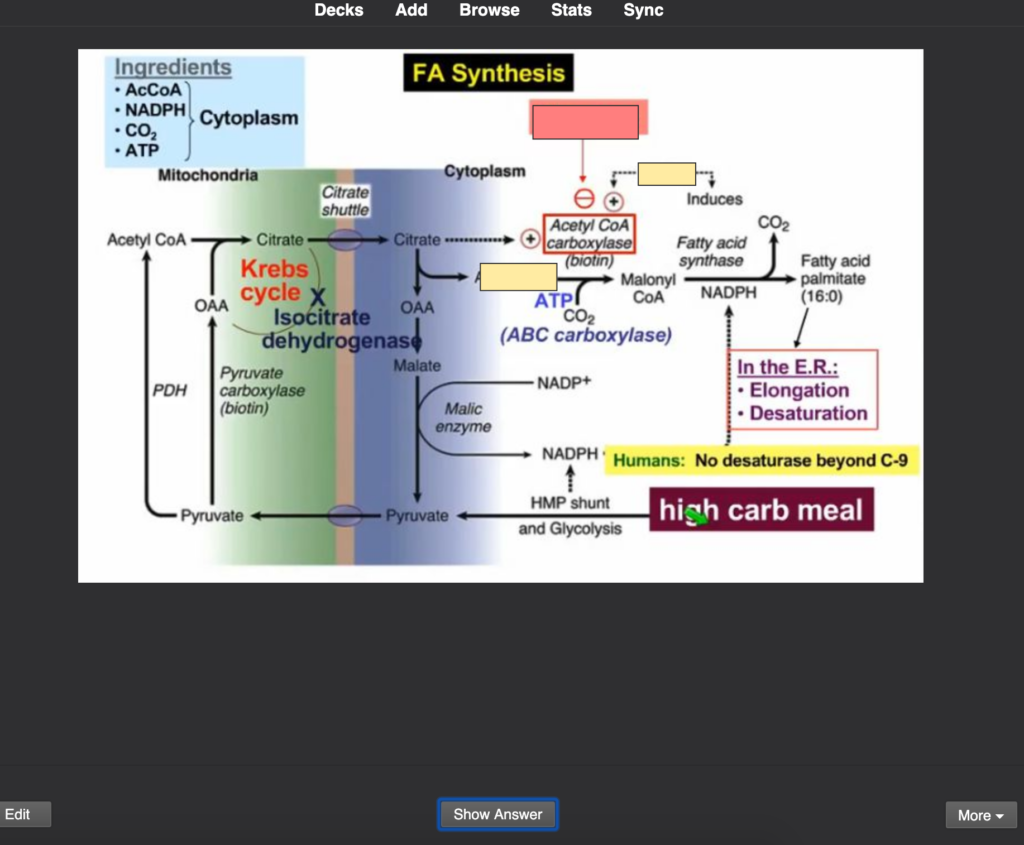
I, personally, use image occlusion when I am really struggling with something (like this pathway) that does well in an image form (like pathways, anatomy, and histology).
3. Hierarchical Tags
Link – Anki Code [594329229]
Nothing to it, just download it and enable it!
Go from this (YUCK).
To this (Nice).
Hierarchical tags is essential if you are using the AnKing, or any deck really that uses multiple tags.
The organization isn’t purely aesthetic either, it adds seconds to minutes of efficiency to your (should be) daily Anki routine, which equals hours and even days of time saved across your four years at medical school.
4. Customize Sidebar
Link – Anki Code [1988760596]
If you can’t already tell I want my Anki to be as pretty as possible as I spend 3-5 hours with it every day. You see all those card types on the bottom left? That is not organized and will slow me down in the long run.
After I enable Customize Sidebar…
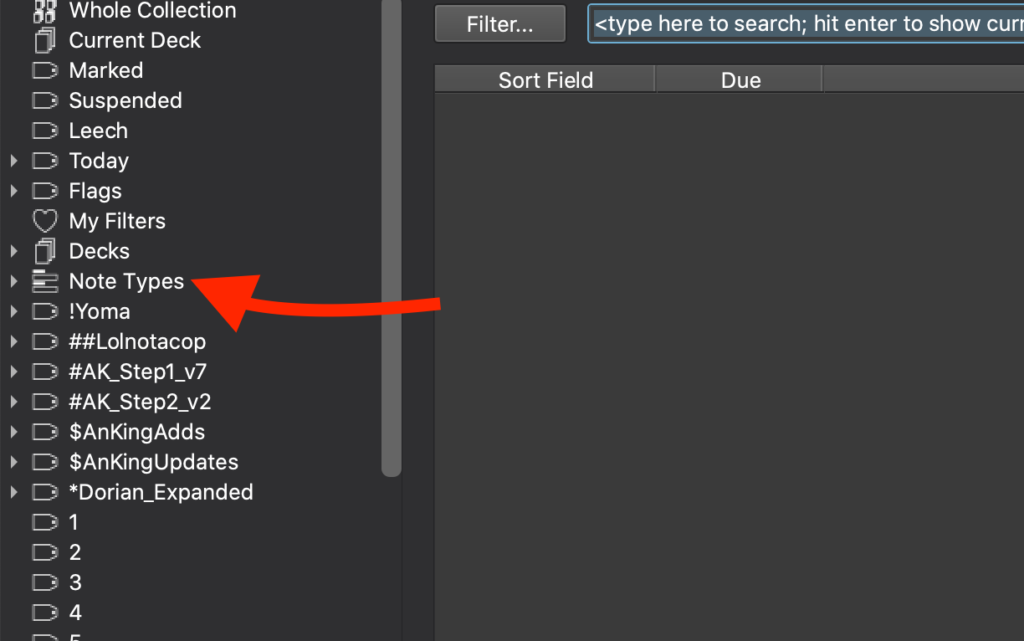
Now all the note types are organized nicely on the side. I don’t think I have ever searched for a card by Note Type as all of my cards are “AnKing Master.”
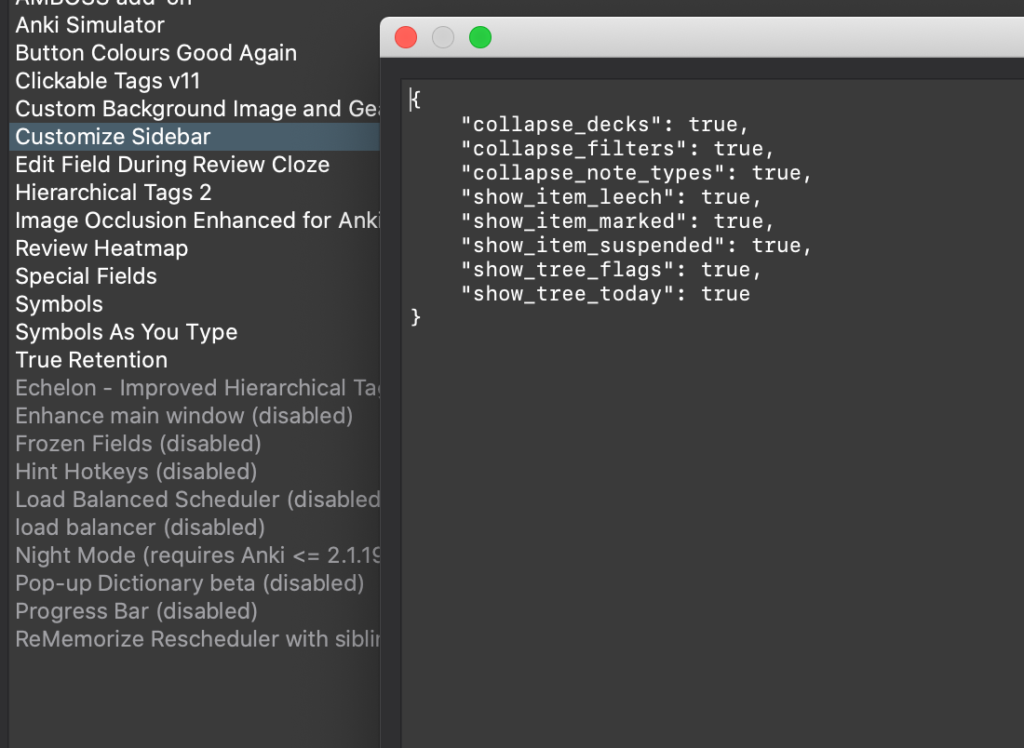
If for some reason your sidebar isn’t collapsed as seen above, go to tools -> addons -> click “Customize Sidebar” -> click “Config.” Make sure they are all set to true.
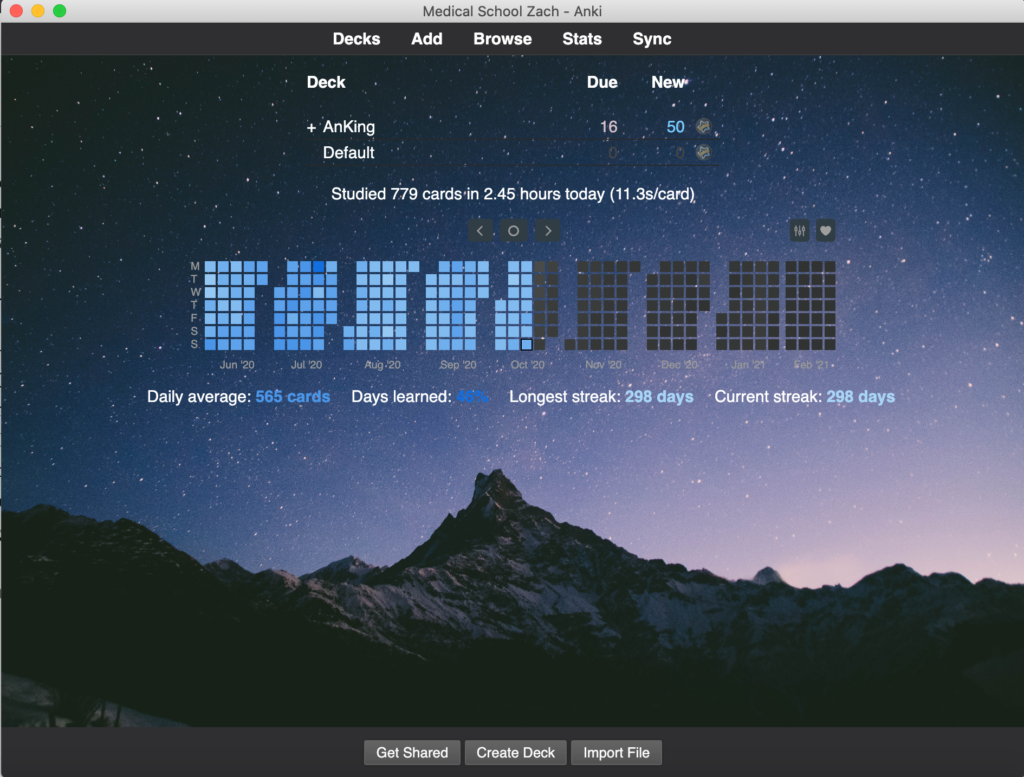
5. Review Heatmap
Link – Anki Code does not work as of now, use link.
Now, this may seem purely aesthetic, but, in my opinion, it is not. Every day I want to keep my streak and get a little boost by seeing it. For example, today I hit 300 days! To me, that’s a big deal.
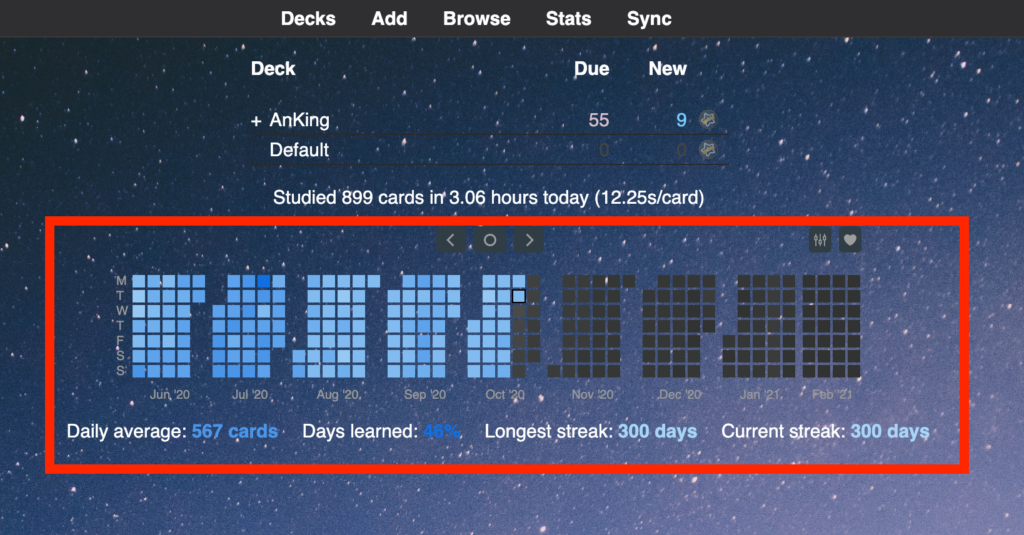
This heatmap can be customized. I think the “ice” version fits nicely with my background.
For example this is “Flame.”
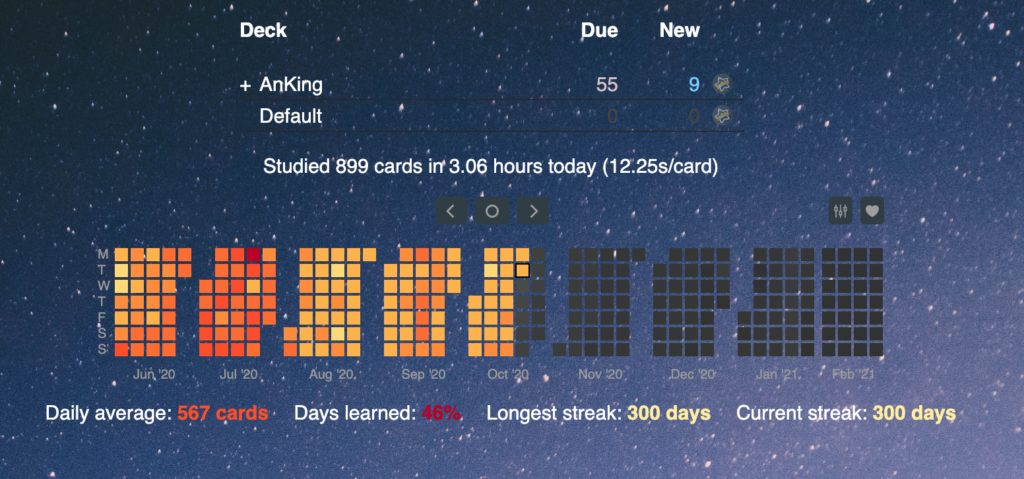
Download it, build your streak!
6. True Retention
Link – Anki Code [613684242]
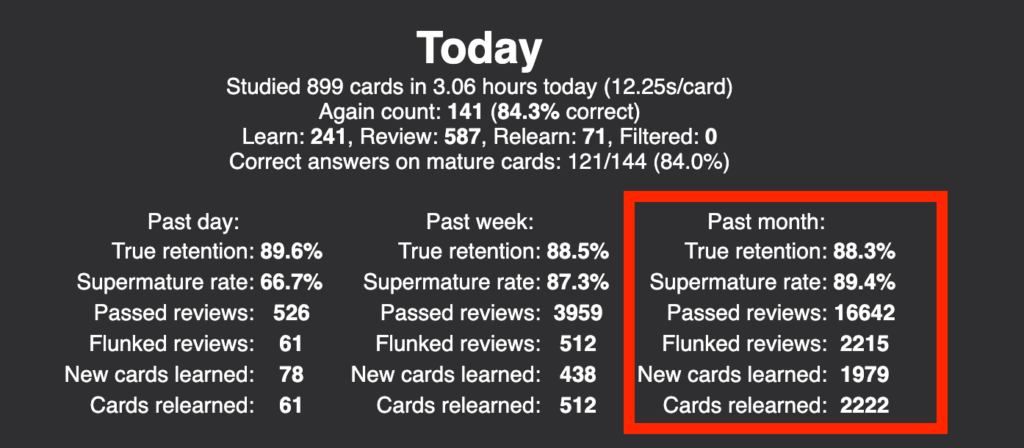
You want to aim for 80-90% True Retention, this app will allow monitoring and get closer to that number.
Disclaimer: Some people argue, for step1, that you should be at 95% +, but, personally, to get that percentage I would have to look at an unmanageable amount of cards every day. The majority of Anki users aim for 85%.
After you download True Retention you have to shift-click “Stats.” If you don’t shift-click, you will get the Anki native stats.
Why do you need a special stats screen? Well, the normal stats screen is ok, for example, I perform better at 9 am.
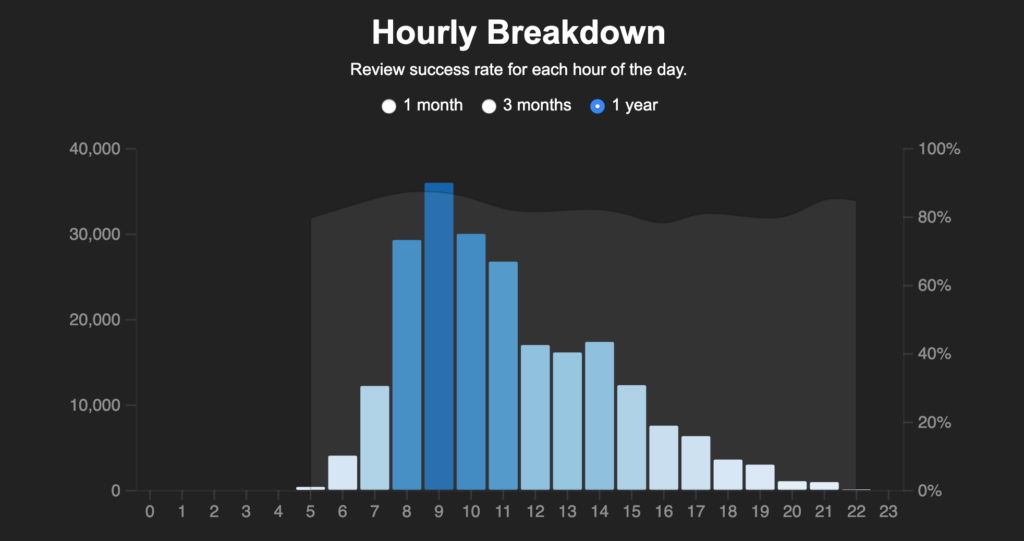
Unfortunately, the default retention rate statistic calculates the percent of correct answers of all cards done. We don’t want that. Cards that we are learning, younger cards, will “contaminate” the retention rate. We want to see how we are doing on mature cards, cards that have an interval equal to or greater than 21 days, because those are better measures of our long-term retention. The built-in stats application retention rate includes these “younger” cards.
However, monthly true retention (in red) is the most important thing I look at. I look at the monthly rate, as opposed to a day or week stat because it is a more accurate representation of where I am at. For a week, and especially a day, the numbers can be truly random. A month is a more accurate display of your performance.
So how do we get to that 80-90% rate? I discuss this and how to optimize for this rate in this post here.
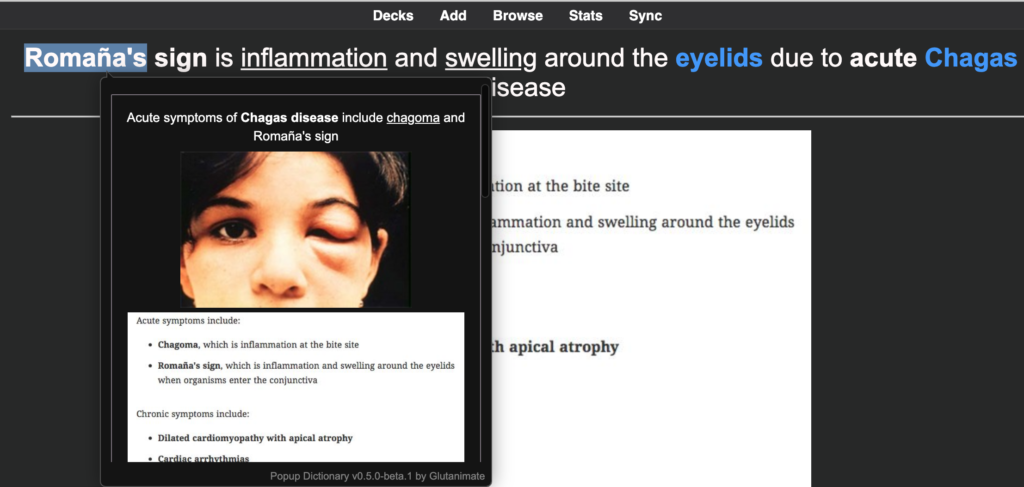
7. *Pop-up Dictionary / Amboss
Link – Anki Code [153625306]
If you have the money I strongly recommend Amboss (I am not sponsored in any way). The information breadth and depth are much better than pop-up dictionary. Also, it works more quickly and smoothly.
For the pop-up dictionary, you can double-click a word or phrase and the pop-up will come up. Or you can highlight a phrase and then do Ctrl/Cmd+Shift+D to activate the dictionary.
The limitation of this is that it pulls up related facts from your card collection, so if these words or phrases aren’t in your Anki deck the addon won’t be able to find information on whatever word you are looking for.
It is still amazing and I would use it if I did not have access to Amboss.
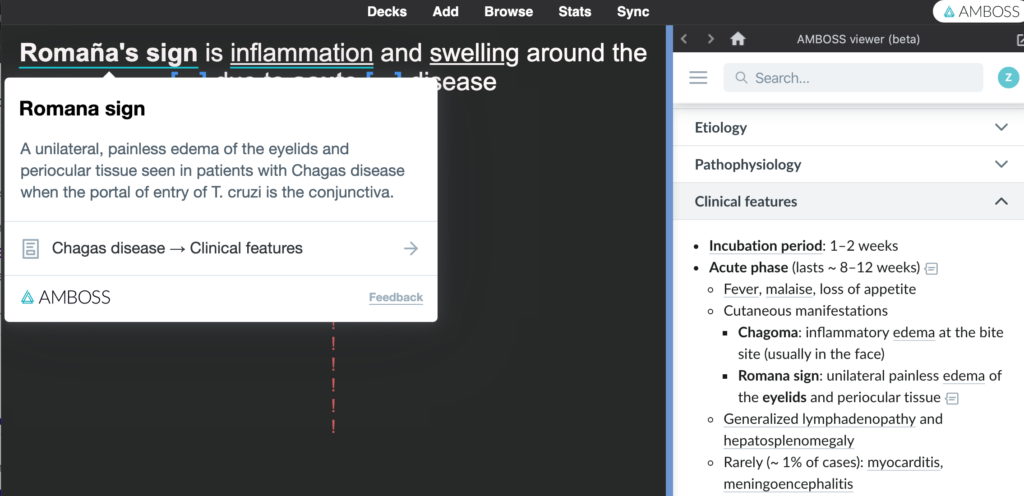
Amboss, however, is better. Here is what Amboss looks like on the same card. I simply scroll over the blue underline for the dialogue and click for the description on the right.
8. Customize Background
This is quite complicated to set up so I have individual post and video guides on how to set up each of them, check them out below:
- Customize Background allows you to make your background ~aesthetic~ like mine here!
Hope this helps you on your Anki journey, these addons should make your experience with Anki efficient, easier, and exciting (I wanted three “E’s”…)
-Zach
2 Comments
Sakibul Hasan · May 3, 2021 at 1:24 pm
Thanks bro!!!
it helped a lot.
Cessy · September 6, 2021 at 3:00 pm
Thank you !!!!